


Originally I made this bag about a month or so ago for a friend. Of course I showed it off on my Facebook and at my favorite chicken chat forums (backyardchickens.com) Oh and if you don't know this about me, my chicken coop is featured as the a frame chicken house in their Raising Chickens for Dummies book!
I have been asked to make bags for all sorts of folks but I am just not looking for another way to make money. So instead I am making this tutorial for all you lovely people who love chickens and recycling.
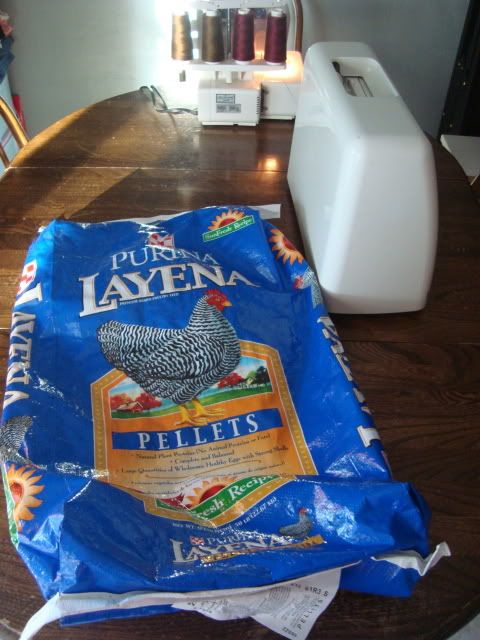
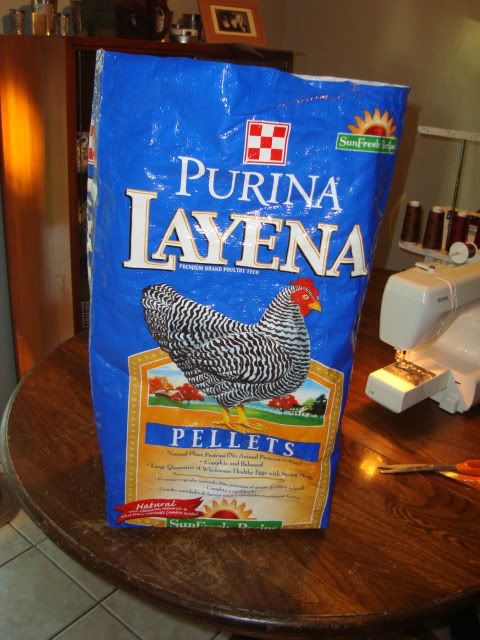
First things first, you need one of these feed bags (I think horse feed and other types of feed come in this stuff now too)
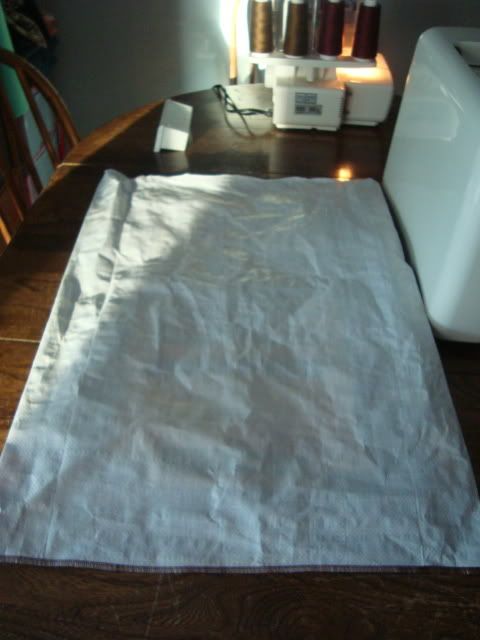
1. cut the bottom and top of the bag so that the lines are nice and straight and then turn it inside out, and serge or sew the bottom of the bag (look inside to make sure it's the bottom cause you don't want your bag to be upside down when you turn it back right side out)
2. once you have the bottom secured, you need to fold the bottom so that the sewn or serged line is at the bottom and it triangulates to make a square flat bottom.
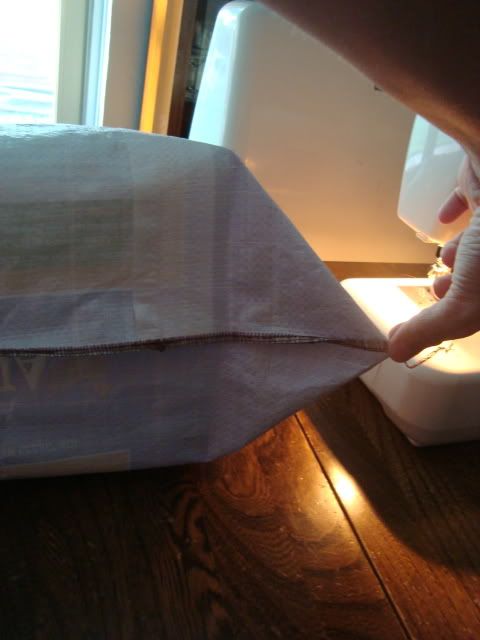
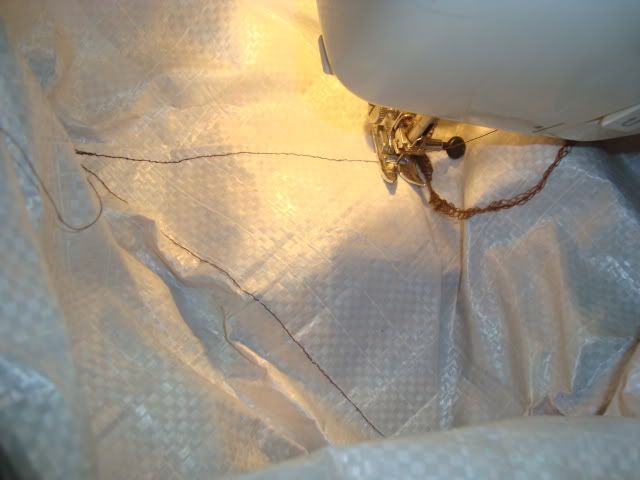
3. Sew the crease to keep it flat bottomed.
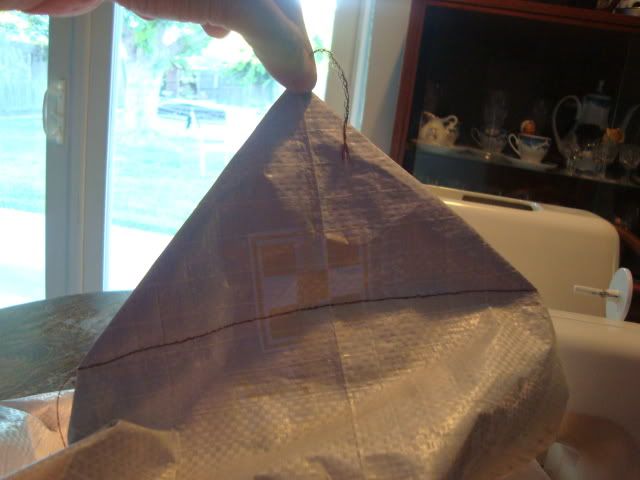
4. Here is where it gets a little tricky. Now you are going to attempt to turn the bag right side out again and then flatten the sides down enough to get the bottom of the bag onto the sewing machine so you can sew the triangle flaps onto the bottom of the bag. You could always cut them off but if you are going to be using the bag for heavier items you will want this extra support.***
Once that is all done it should look like this inside.
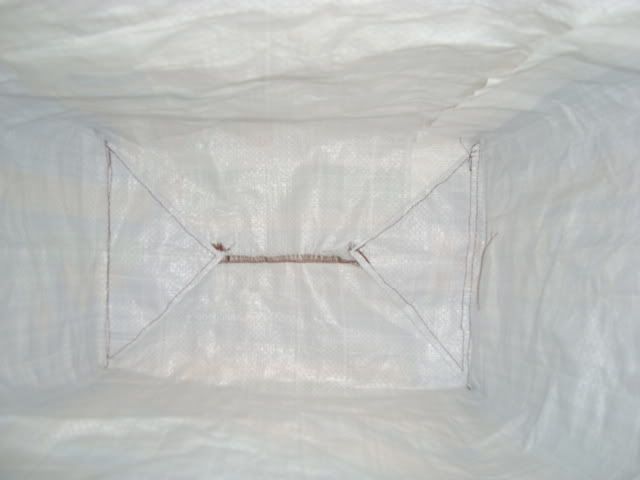
and outside it should stand up quite nicely.
You are more than halfway there...
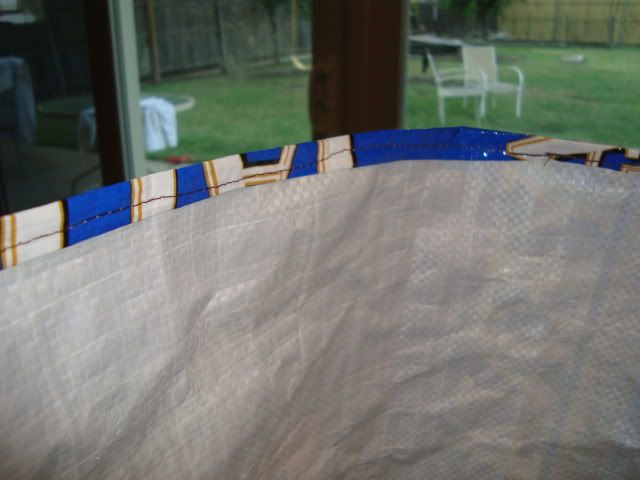
5. Now that we have that all finished you will want to trim the top about 4 inches (save this for the handles), then fold down and hem the top all the way around.
6. for the handles what I like to do is fold them in half and fold in the cut edges and then sew all the way around so both sides of the handle are hemmed.
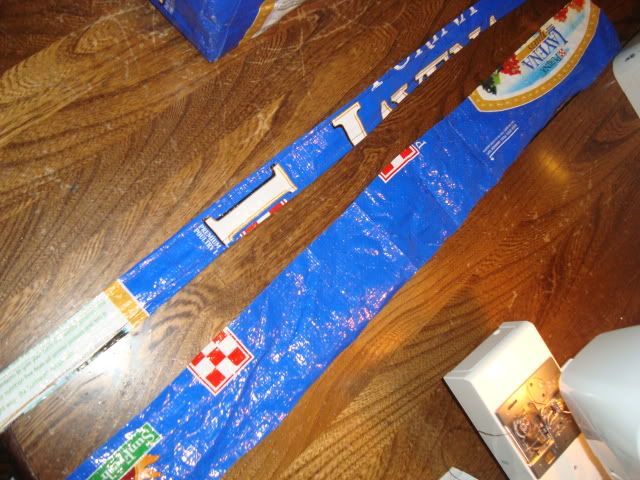
7. Here it's going to take a little play, since every bag is different you will want to make sure the handles are exactly the same length. I do this by making identical marks on both sides of the bag, I know you only see two but there are 4 marks total.

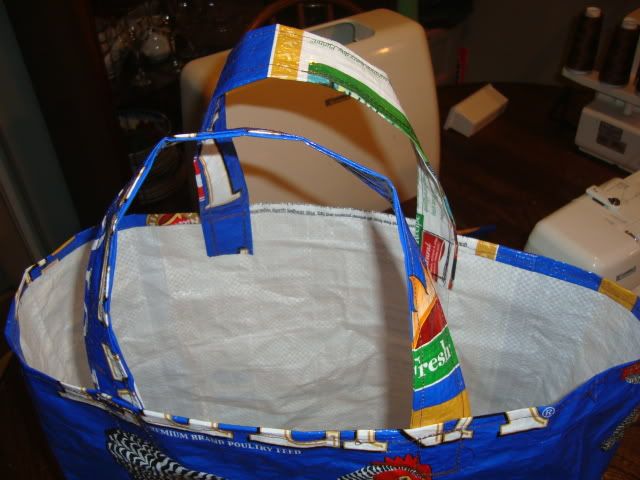
8. Sew the fist handle in place using a box method, I go forward and back several times to ensure a good bond.

I measure and mark my second handle to ensure everything is perfectly aligned. Then sew on the second handle.
TA DA! You have finished your bag!
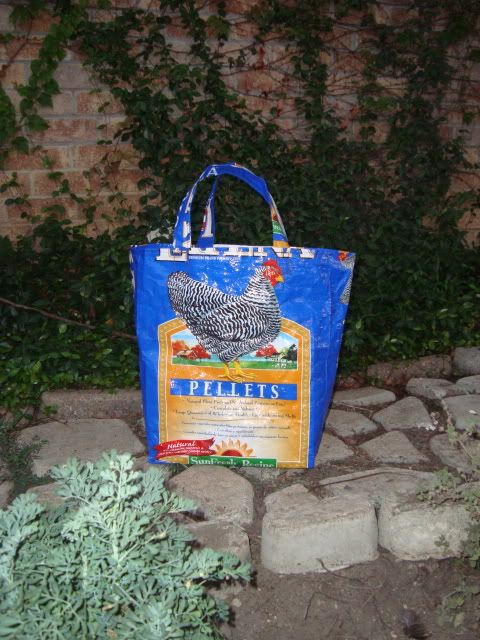
It takes me between 30 minutes to an hour to finish a bag.
Have fun!
**** Edited to add that if you don't want to sew down the triangles on the inside you can glue them down.


Great tutorial! This is how I made mine a few years ago...except I make an X in the center of the handles "box" for just a little extra stability. Also a tip is to cut the top the the correct size first so you have less to worry about when doing the bottom (so it isn't all bunched up under the sewing arm.
ReplyDeleteI saw this project on byc.com and LOVE it. I always hated throwing away a perfectly good bag. I'll have to try this one. Great save.
ReplyDeleteKathy my BYC peeps are the reason I made this tutorial. If it hadn't been for y'all I wouldn't have even thought about doing one :) So thank you for inspiring me to do it!
ReplyDeleteCould put a bunch of these together to make a colorful picnic table cloth too. Thanks for the idea!!
ReplyDeleteThanks SO MUCH for this tutorial! I was able to make several bags with your help.
ReplyDeleteKansaseq, BYC
I love your tutorial!
ReplyDeleteI have been making these bags for about a year now but the way you make the bottom is much easier than the way I was doing it.
Thank you!
I like the picnic table cover idea. I'll continue to save my bags and make one!
ReplyDeleteI guess you get better with practice? I just finished my first one (I'm a seasoned sewer) and it took me several hours and a broken needle to the eye - haha! Thank you so much for the tutorial! With 2 big dogs to feed, I'll have plenty of practice. (And thanks for the note on gluing it down... I may try that next time?)
ReplyDeleteGreat job!
What kind of sewing machine do you use to sew this type of material? I tried with my kenmore, but it failed miserable. The seams weren't clean and it kept jamming in the machine. The bags are sooo cute though and I want to make them. Looking into buying a new sewing machine!
ReplyDeleteI had made something similar to this out of a cat good bag. My neice brought me one of these bags and asked if I would make her one. I love your tutitorial it was so much quicker than the other way I had done one.
ReplyDeleteDo you wash the bags (by hand or machine) prior to cutting and sewing? Thank you for the tutorial! :)
ReplyDeleteand to think I've been wasting them as my next trash bag all this time.Thank you ma'am
ReplyDelete